Room-by-room plan for a DIY full-home declutter
If your home feels like it has quietly filled up with "later" items, you are not alone. The trick is not to attack everything at once. A good room-by-room plan for a DIY full-home declutter turns a huge, slightly overwhelming job into a series of manageable wins. You keep momentum, avoid making the house look worse before it gets better, and you can see progress without losing your whole weekend to sorting piles on the landing.
Truth be told, decluttering is rarely just about tidying. It is about decision fatigue, storage that has run out of mercy, and the odd drawer that seems to breed tangled chargers overnight. This guide walks you through a practical whole-home declutter plan, room by room, with realistic steps, safety notes, and simple systems that work in everyday UK homes, whether you are in a flat, a terraced house, or a family home with the usual mix of toys, paperwork, and "I might need that one day" stuff.
For items that are too bulky, too heavy, or just too much for a car boot run, it can help to know your options in advance. Services like house clearance, furniture disposal, and rubbish removal can sit alongside your DIY work when you need a sensible exit route for unwanted items.
Quick takeaway: declutter by zone, not by mood. Start with easy wins, build from low-stakes spaces to high-sentiment rooms, and clear waste as you go so the project does not spiral into a second job.
Why a room-by-room plan matters
A full-home declutter sounds simple until you begin. Then the questions arrive. Where do I start? Why is every room connected to three other rooms? How has one small cupboard produced seven umbrellas, four tote bags, and a broken lamp?
A room-by-room plan matters because it gives your declutter a shape. Instead of wandering from drawer to drawer, you work with boundaries. That makes decisions easier and the job less emotionally messy. You can finish a space properly before moving on, which is especially helpful in homes where clutter has spread from one room into another.
There is also a practical side. If you sort items room by room, you can group things by disposal route more easily. Old bedroom furniture might need sofa removal or furniture collection. Broken appliances may need white goods recycle. Soft furnishings often need different handling from general rubbish, and the more clearly you separate them, the faster the end stage becomes.
It also reduces that horrible half-finished feeling. You know the one. Bags in the hallway, a bin liner of cables in the kitchen, and a strange mug collection on the stairs. A plan helps you avoid that chaos. To be fair, most decluttering disasters begin with good intentions and no system.
How a room-by-room plan works
The method is straightforward: pick one room, set a time limit, sort everything into clear categories, and remove items before moving on. You repeat that process until the house is done. The real power lies in the order and the rules you set for yourself.
Here is the basic flow:
- Choose the room. Start with somewhere low pressure, like a spare room or hallway cupboard.
- Empty one section at a time. A drawer, shelf, wardrobe rail, or under-bed space.
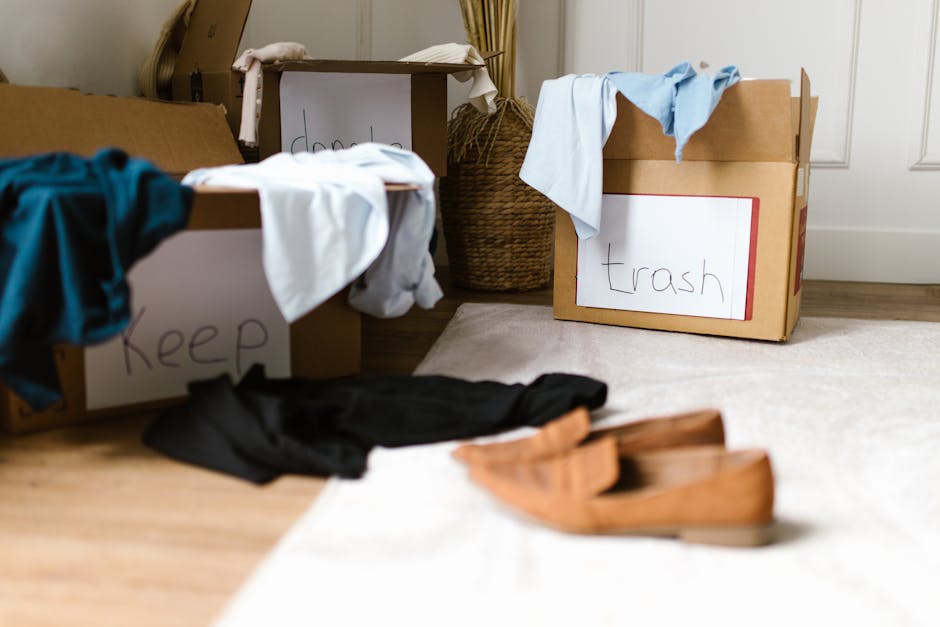
- Sort into four groups. Keep, donate/sell, recycle, and dispose.
- Make immediate decisions on obvious items. Do not build "maybe" mountains unless you really must.
- Move outgoing items out of the room. Put donations in one place, rubbish in another, and bulky items somewhere safe and dry.
- Clean the cleared area. Wipe shelves, vacuum edges, and notice what the room really needs now.
- Only then move on. That is how the momentum builds.
The idea is not to create a showroom. It is to reduce excess and improve how the home functions. A room-by-room approach works especially well if you are decluttering around a move, after a bereavement, before a renovation, or simply because life has got busy and the house has absorbed the evidence.
Some homes need extra support at the disposal stage. If you end up with a lot of mixed items, a bulky waste collection or bulk waste collection can be the simplest next step, particularly when you cannot sensibly take everything to a tip yourself.
Key benefits and practical advantages
| Benefit | What it means in real life | Why it matters |
|---|---|---|
| Less overwhelm | You only think about one space at a time | Decisions feel easier and progress is clearer |
| Better sorting | Items stay grouped by room and purpose | Donation, recycling, and disposal are simpler |
| Faster visual results | One room improves noticeably before the next begins | Motivation stays high |
| Lower waste | You notice what can be reused or recycled | More responsible disposal choices |
| Reduced duplication | You see how much of the same item you own | Helps stop buying extras you do not need |
One of the best things about this approach is that it shows up the hidden patterns. Maybe you keep buying storage baskets because the cupboards are jammed. Maybe the hallway is full because the loft has become a graveyard for "just in case" items. Once the clutter is seen by zone, the real problem becomes obvious.
Another advantage is emotional. People often underestimate how draining background clutter can feel. You may not notice it minute by minute, but your eye does. Your brain does too. Clearing the entrance hall, the kitchen worktops, or the bedside area can make the house feel quieter. Not silent, just easier to live in.
If you are dealing with lots of mixed household waste while sorting, the broader waste clearance and waste disposal options can be useful reference points when you decide what should go where.
Who this is for and when it makes sense
This plan suits almost anyone, but it is especially useful if you:
- feel stuck by clutter and do not know where to begin
- are preparing to move home, downsize, or decorate
- have inherited a property that needs clearing carefully
- live in a flat or terrace where storage is limited
- need to sort a mix of furniture, clothing, paperwork, and household items
- want to declutter without booking a full clearance straight away
It also makes sense if you are balancing the job around work, family, or mobility limits. You do not need to do the whole house in a day. In fact, please do not try. A sensible room-by-room schedule is far more sustainable, and much kinder on your back.
For households in London, where access and parking can make disposal more complicated, planning ahead matters even more. A first-floor flat in Fulham or a compact property in Islington can need a different logistics plan from a house with a drive. The declutter itself is the same idea, but the exit route for items may differ.
If the job is bigger than expected, there is no shame in splitting it. DIY decluttering and professional support are not opposites. They can work together neatly.
Step-by-step guidance
1. Prepare your sorting setup
Before you touch a single shelf, prepare bags, boxes, labels, cleaning cloths, and gloves if needed. Put these in one place so you are not hunting for bin liners halfway through. A simple labelling system helps: keep, donate, recycle, bin, relocate.
That tiny bit of preparation saves a huge amount of faffing. Honestly, that is where many declutters go wrong. You get excited, open a cupboard, then spend 25 minutes wandering around with one shoe and a dustpan.
2. Start with the easiest room
Choose a low-emotion space first. Good options are:
- hallway
- downstairs cloakroom
- utility area
- spare room
- under-stairs cupboard
The point is not just to get a room done. It is to prove the system works. A quick win builds momentum and makes the tougher rooms less intimidating.
3. Work from visible to hidden
In each room, begin with open surfaces, then move to cupboards, drawers, and storage furniture. That order gives you an immediate visual reward. A cleared sideboard or worktop can change the whole feel of a room within minutes.
4. Sort by usefulness, not guilt
Ask simple questions:
- Do I use this?
- Do I love it enough to keep it?
- Is it working, complete, and in good condition?
- Would I buy it again today?
If the answer is no, the item probably does not deserve prime real estate in your home. Some things can be donated. Some need recycling. Some need a proper disposal route. And yes, some are just ready to go.
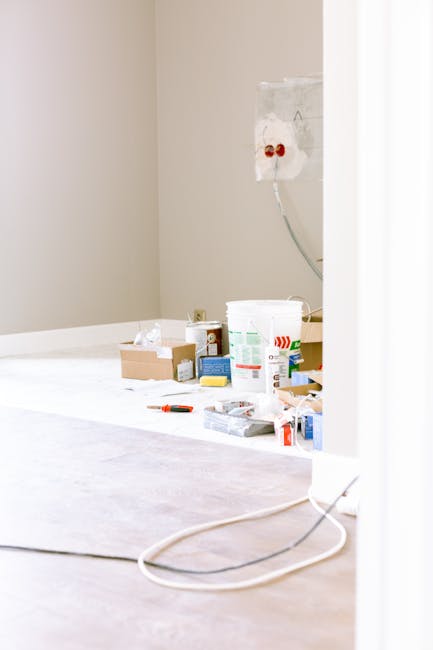
5. Deal with bulky or awkward items separately
Set aside larger objects as you find them. Old sofas, mattresses, fridges, wardrobes, and broken chairs need their own plan. Do not let them block the hallway for three weeks. That becomes visual clutter all over again.
Depending on the item, you may use mattress disposal, bed disposal, fridge disposal, or sofa collection. If the item is still usable, furniture clearance or furniture disposal may be the better path.
6. Clean as the room clears
Once a zone is emptied, clean it properly. Vacuum corners, wipe shelves, and notice any damage, mould, or loose fittings. This is one of those small steps that changes the outcome. The room stops looking like a storage dump and starts looking like a room again.
7. Move room by room in a sensible order
A practical home sequence is usually:
- hallway and entryway
- living room
- kitchen
- bedrooms
- bathroom and airing cupboard
- loft, garage, garden, or shed
This is not the only valid order, but it works well because it starts with spaces that affect your daily mood and ends with the more physically demanding storage areas.
8. Finish with the overflow spaces
Lofts, garages, and sheds often become the final boss. They collect holiday decorations, half-used paint tins, broken furniture, and items that migrated there during previous declutters. When you reach them, be honest. If something has lived in the loft for eight years and nobody has missed it, that is a clue.
For many households, a dedicated loft clearance or garage clearance can help finish the project cleanly.
Expert tips for better results
Here are the things that make a real difference, not just the sort of advice that sounds good on paper.
- Use a timer. Forty-five minutes of focused work is often better than a chaotic full day.
- Don't declutter when hungry or exhausted. You will keep the wrong things out of pure fatigue.
- Use a "relocate" box. Items that belong in another room should not derail the current space.
- Cap your "maybe" pile. If everything is maybe, nothing gets finished.
- Take one before photo. Not for social media, unless you want to, but for your own motivation.
- Match disposal to item type. A mattress is not the same as a chair, and a fridge is certainly not the same as general rubbish.
One useful habit is to keep a donation box by the front door while you work. The second something is clearly leaving the house, it goes there. No double handling, no second guessing. Small thing, huge payoff.
And if you are in a busy household, choose quieter times. Early morning on a Saturday can be ideal. Music on, kettle on, nobody asking where their favourite jumper is every twelve minutes. Bliss, almost.
Common mistakes to avoid
Most declutters go off track for a few predictable reasons.
Trying to do the whole house at once
This sounds efficient but usually creates an indoor storm. You end up with bags everywhere and no finished room. A full-home declutter works best when you finish one area before opening another.
Keeping items because they are expensive
Past cost is not the same as future value. The money is already spent. If the item is not useful or wanted, keeping it out of guilt just creates more clutter.
Mixing sorting with sentimental decisions
Do not start with your childhood schoolwork and wedding keepsakes. Save those for later. Begin with the easy, non-emotional stuff so you have more decision-making energy.
Forgetting the exit plan
Sorting is only half the job. If donations, recycling, and rubbish do not leave the home quickly, the project stalls. That is where a pre-planned collection route becomes valuable.
Not separating recyclable items
Paper, cardboard, metal, and some plastics can often be handled differently from general waste. If you care about lowering what goes to landfill, give that category its own box.
Another common one: keeping empty storage containers "just in case." We all do it. The cupboard full of boxes tells on us, really.
Tools, resources and recommendations
You do not need specialist equipment, but a few practical items make the whole process smoother:
- sturdy bin bags
- cardboard boxes or reusable crates
- marker pens and labels
- microfibre cloths
- rubber or work gloves
- dust sheets or old towels
- tape measure for furniture decisions
- basic cleaning spray and vacuum
For disposal planning, it helps to know the difference between everyday rubbish and heavier items. A pile of old toys or kitchen clutter may fit general rubbish clearance, while a set of worn-out wardrobes may need large item collection or a wider home clearance solution.
If you are comparing options, also look at whether the service offers sorting support, loading help, or recycling routes. And check practical basics such as access, payment, and quoted scope. A clear estimate matters more than a vague promise.
You may also find it useful to review pricing and quotes before deciding whether to do everything yourself or bring in help for the heavy lifting.
Law, compliance, standards, or best practice
For a DIY declutter, the main thing is to dispose of waste responsibly and safely. In the UK, householders are expected to use legal and appropriate routes for waste, especially for bulky items, electricals, or anything that could be hazardous if dumped incorrectly. You do not need to memorise regulations for every object, but you do need to avoid fly-tipping, unsafe lifting, and careless disposal.
Best practice is straightforward:
- check what can be reused, donated, recycled, or repaired
- keep electrical items separate where possible
- do not place hazardous items in general household waste unless the local guidance allows it
- follow local council instructions for large-item or bulky waste collections
- use a licensed waste carrier if you are paying someone to remove items
Safety matters too. If a space contains damp, dust, sharp edges, or heavy items stacked awkwardly, slow down. Wear sensible footwear, lift with care, and avoid moving anything that feels unstable without help.
For extra reassurance, it is worth reviewing the site's guidance on health and safety policy and insurance and safety. If your clear-out includes mixed waste from a renovation or DIY project, the builders waste clearance page may also be relevant.
Options, methods, or comparison table
| Method | Best for | Pros | Trade-off |
|---|---|---|---|
| DIY room-by-room declutter | People with time and a manageable amount of clutter | Low cost, flexible, satisfying | Takes longer and needs self-discipline |
| DIY with occasional collection support | Homes with bulky or mixed items | Keeps momentum and removes heavy lifting | You still need to sort and prepare |
| Full professional clearance | Large, time-sensitive, or emotionally difficult clear-outs | Fast, efficient, less physical strain | Higher cost than doing everything yourself |
If you are unsure which route to take, start with DIY sorting and then decide what is too large, too heavy, or too time-sensitive to handle yourself. That hybrid approach is often the sweet spot. It gives you control without pretending every item can be handled in one person's kitchen bin.
Case study or real-world example
Consider a typical three-bedroom London terrace with a loft, a busy kitchen, and two bedrooms acting as "storage with beds." The owners had not done a proper declutter in years. Every room looked fine at first glance, but drawers were full of duplicates, the hallway had old shoes and parcels, and the loft had become a graveyard for broken furniture and childhood furniture that nobody wanted to admit was finished.
They started with the hallway, which took just over an hour. That alone changed how the house felt. Then they moved to the living room, where they found three blankets, five candles, and a pile of cables for devices nobody owned anymore. Kitchen next. They sorted food storage, chipped mugs, and duplicate utensils, which made the worktops usable again. Not glamorous, but deeply satisfying.
The hardest space was the loft. There were old chairs, a mattress, and a damaged cabinet that had to go. They kept the good sentimental boxes, separated recyclable bits, and arranged collection for the bulky pieces. By the end of the weekend, the house was not perfect, but it was calm. The family could open cupboards without a minor crisis. That is the kind of win that matters.
If you find yourself in a similar position, a service like bulky waste collection can be a very practical finishing move. Not a shortcut, just a sensible final step.
Practical checklist
Use this before you begin, and again before you leave each room.
- Choose one room or zone only
- Set a realistic time block
- Prepare bags, boxes, labels, and cleaning supplies
- Decide where donations will go
- Confirm how recycling and rubbish will be handled
- Remove obvious clutter first
- Sort items into keep, donate, recycle, and dispose
- Deal with bulky items separately
- Clean the cleared space
- Take outgoing items out of the room immediately
- Review whether any items need special handling
- Stop before you are too tired to decide well
Mini checklist for hard-to-decide items:
- Have I used this in the last year?
- Would I pay to move it if I were moving house tomorrow?
- Is it broken, incomplete, or out of date?
- Could someone else use it more than I do?
Keep that last list nearby. It saves time, and it cuts through sentimental fog in a surprisingly useful way.
Get a free quote today and see how much you can save.
Conclusion
A room-by-room plan for a DIY full-home declutter is one of the simplest ways to make a big job feel doable. It gives you order, reduces stress, and helps you make clearer decisions about what stays, what goes, and what needs a proper disposal route. More importantly, it helps your home work better for you day to day.
Start small. Finish one space. Then another. The house does not need to be transformed in one heroic burst, and you certainly do not need to do it perfectly. A thoughtful, steady approach usually wins. And once the clutter starts to clear, the difference is oddly emotional. The rooms breathe better. So do you.
When you are ready to move bulky items on or want help turning sorted piles into a proper clear-out, you can learn more about the company on the about us page or get in touch through the contact page. Sometimes that little bit of extra support is what turns a half-finished job into a proper fresh start.
Frequently Asked Questions
What is the best room to start a full-home declutter?
Start with the easiest, least emotional space, such as a hallway cupboard, spare room, or utility area. A quick win builds momentum and makes the next room feel more manageable.
How long does a room-by-room declutter take?
That depends on the size of the house and how much stuff you have, but most people do better with short sessions rather than one exhausting day. A single room can take anywhere from an hour to a full weekend if it is heavily packed.
Should I declutter by room or by category?
For a full-home reset, room by room is usually easier because it keeps decisions contained. Category-based decluttering can work well for clothes or paperwork, but it can become chaotic in a whole house.
What should I do with items I want to donate?
Put donations in a separate box or bag and remove them from the home quickly. If they are too large for a normal drop-off, arrange collection or ask whether local charities can accept them in good condition.
How do I deal with bulky furniture during a DIY declutter?
Set bulky items aside as soon as you find them and decide whether they need furniture collection, bulky waste collection, or disposal. Do not leave them in the middle of the room while you continue sorting around them.
What is the safest way to declutter a loft or garage?
Wear sturdy shoes, use good lighting, and avoid moving heavy or unstable items alone. Work slowly and clear a path before lifting anything awkward. If the space is dusty, damp, or full of stacked objects, take extra care.
Can I recycle everything I do not want?
No, not everything can be recycled. Some items need specialist handling, especially electricals, mattresses, and certain mixed materials. Check local guidance or separate items for appropriate disposal routes.
How do I stop clutter coming back after the declutter?
Set small rules, like one-in-one-out for certain items, and keep donation boxes handy. Also review problem zones regularly, because clutter usually returns to the same places first.
Is it worth paying for help with part of the job?
Often, yes. Many people keep the sorting and decision-making for themselves, then pay for lifting or disposal of bulky items. That hybrid approach can save time and reduce strain.
What if I get overwhelmed halfway through?
Stop, finish the current sorting box, and walk away from the room. Do not spread the mess to a second room. Reset, drink some water, and come back with a shorter time block.
Do councils collect large household items?
Many councils offer some form of large-item or bulky waste collection, but the rules vary by area. Always check your local council guidance before relying on it, especially for heavier or mixed items.
When should I call in professional clearance help?
If the home contains too much waste, very heavy furniture, or a deadline such as a move or tenancy end, professional help can be the sensible choice. It is also worth considering when access is tricky, such as top-floor flats or homes with narrow stairways.